Practical
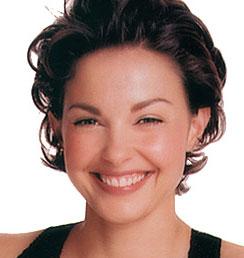
1. Open an image.
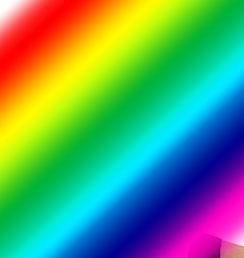
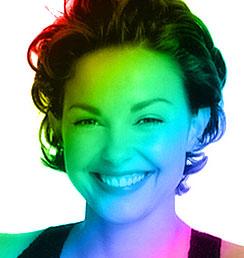
2. Create a new layer. Select Gradient Tool and select "Transparent Rainbow" from the Option Bar. Drag the tool from top left to bottom right. Keep the layer selected.
3. Change the blending mode to "Color"
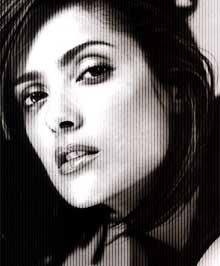
Vertical Lines
1. Open Photoshop. Open an image to apply vertical lines effect.
2. Create New file with 3 pixel width, 3 pixel height and transparent background.
3. Select black as a foreground color. Draw vertical line using Pencil Tool.
4. Select All using CTRL + A
5. Create a pattern by Edit > Define Pattern. Name the pattern.
6. Close the Pattern file and go back to image file. Create new layer. Keep it selected.
7. Edit > Fill
(Choose "Pattern" from "Use" drop down menu and again in "Custom Pattern" you will find newly created pattern)
8. Select newly created pattern and fill the layer. Change the layer mode to "Soft Light"
|
|
Using Grids
1. Open Photoshop. Open an image to apply grid effect.
2. Create New file with 10 pixel width, 10 pixel height and transparent background.
3. Keep Black as a foreground color. Fill the top and left 1 pixel area of transparent background with black color using Pencil Tool.
4. Select All using CTRL + A
5. Create a pattern by Edit > Define Pattern. Name the pattern.
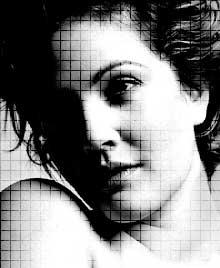
6. Close the Pattern file and go back to image file. Create new layer. Keep it selected.
7. Edit > Fill
(Choose "Pattern" from "Use" drop down menu and again in "Custom Pattern" you will find newly created pattern)
8. Select newly created pattern and fill the layer. Change the layer mode to "Overlay"
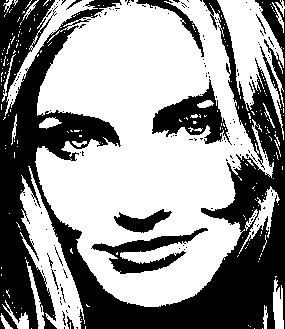
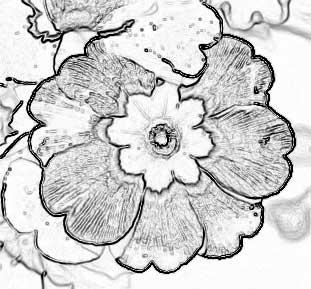
Black & White Sketch
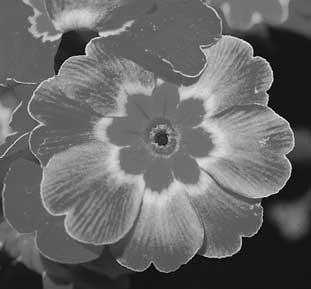
1. Open Photoshop. Open desired image. We need to convert it first into black & white.
2. Image >Adjustments > Threshold
3. Filter > Stylize > Diffuse
Select "Anisotropic"
4. Filter > Sharpen > Sharpen More
Tonal Balance
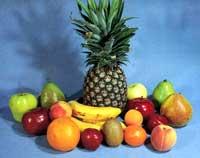
1. Open Photoshop. Open an image to try retouching commands.
2. We will try Auto Levels first.
3. The Level are used to adjust the tonal balance of an image moving the sliders manually. It gives more precise results. But for the beginners, Photoshop provided the Auto Levels command which does the same operation automatically. Auto Levels adjust each color channel individually.
4. Image > Adjustments > Auto Levels
5. The image is clear and sharp.
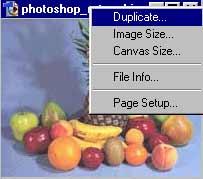
6. Make a duplicate of the original image by right clicking on the blue title of an image and select Duplicate.
7. We will try Auto Contrast now.
8. Auto Contrast does not adjust the channels individually like Auto Levels. It detects the lightest and darkest pixels in an image, setting them to white and black making highlights appear lighter and shadows appear darker.
9. Image > Adjustments > Auto Contrast
10. Make another duplicate of the original image by right clicking on the blue title of an image and select Duplicate.
11. We will try Auto Color this time.
12. Auto Color is the quick way to remove color cast throughout an image.
13. Image > Adjustments > Auto Color
14. Keep all the images side by side to make out the difference between these commands.
Changing Colors
1. Open an image. Select the shirt with magic wand tool (Press Shift and click) or you can use Quick mask mode method for accurate selection.
2. Image > Adjust > Color Balance
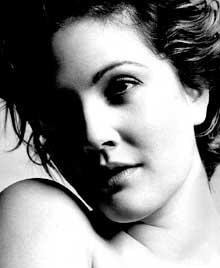
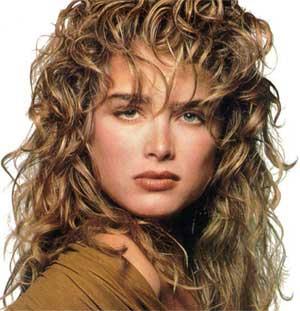
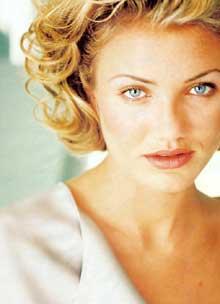
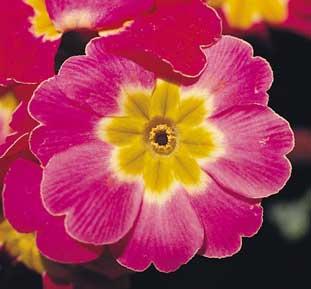
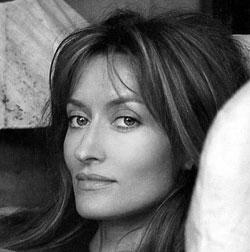
Original Image
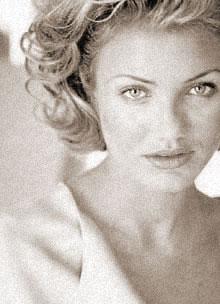
Color Levels : 100 -100 0
Tone Balance : Midtone
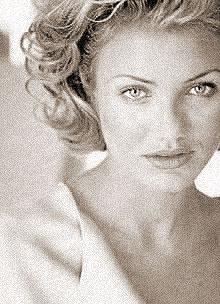
Color Levels : 100 0 0
Tone Balance : Midtone
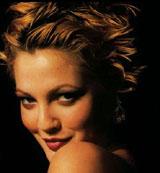
Color Levels : 100 0 0
Tone Balance : Midtone
3. Image > Adjust > Hue Saturation (Click Colorize)
HSL : 0 94 -44
HSL : 124 19 0
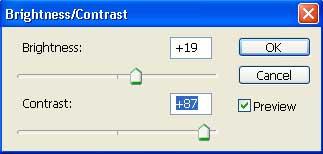
4. Image > Adjust > Brightness/contrast
B : 70 C : 0
B : 37 C :10
5. Image > Adjust > Variations
Midtones More Yellow
Midtones More Blue
Adding Glow
1. Open Photoshop. Open an image to try retouching commands.
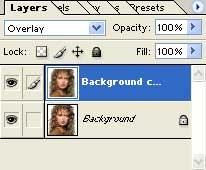
2. Drag the background layer on the icon of the layer palette, which says "Create a New Layer"
3. Background layer is duplicated. Keep the copy selected.
4. Filter > Blur > Gaussian Blur (Radius 3 pixels)
5. Change the properties of background copy layer. Change the blend mode to Overlay.
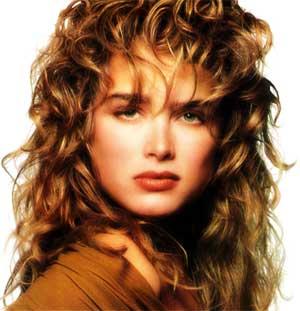
6. The image is retouched. It is enhanced and smooth.
Metal Polish
1. Open Photoshop. Open the image to apply metal polish.
2. Make a duplicate of the background layer and keep the duplicate layer selected. Change the top layer mode to "Screen"
3. Image > Adjustments > Hue/Saturation (Hue: 0 Saturation: +70 Lightness: +10)
4. Image > Adjustments > Brightness/Contrast (Brightness: +20 Contrast: +20)
5. Filter > Sharpen > Sharpen
Using Color Balance
Concept: The lesson is designed using Adobe Photoshop. We have used selections, different combination of image editing tools and filters for most of the effects. Photoshop comes up with lots of the options and scope for experiment is much more than you can imagine. We wish to encourage you to use different options and tools to get better output. The lessons and techniques described need to be followed as a guideline to achieve the effect.
1. Open an image.
2. Change it to gray scale using Image > Adjustments > Desaturate
4. You will get the following selection.
5. Layer > New Adjustment Layer > Color Balance
6. Click OK and you will get Color Balance box. Move the sliders to get following values for Midtones.
7. Select Highlights and move the sliders to get following values forHighlights.
8. Select Shadows and move the sliders to get following values for Shadows.
9. Try to match the color with original and experiment using different values.
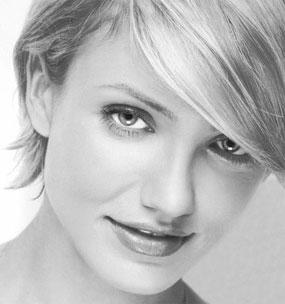
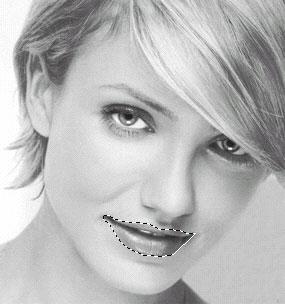
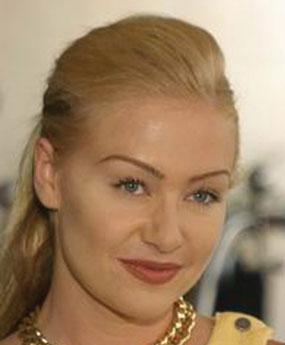
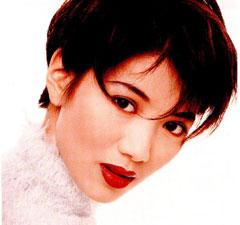
Coloring Lips
1. Open an image.
2. Select lips using Polygon Lasso Tool.
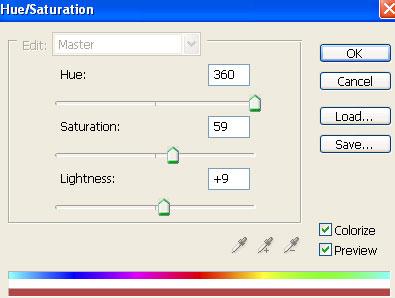
3. Layer > New Adjustment Layer > Hue/Saturation
4. Click OK and you will get Hue/Saturation box. Check Colorize button ON. Move the sliders to get following values.
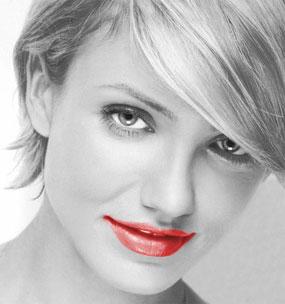
5. Try to create natural color and experiment using different values.
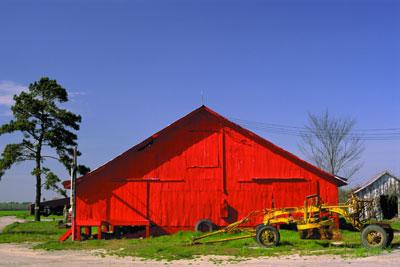
Adding Clouds
1. Open Photoshop. Open the image to add clouds.
2. Create a new layer. Keep the color selection box to black and white color. keep the new layer selected.
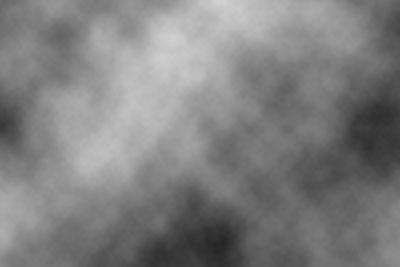
Filter > Render > Clouds
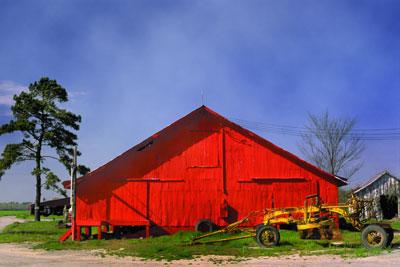
3. Change the top layer mode to "Soft Light"
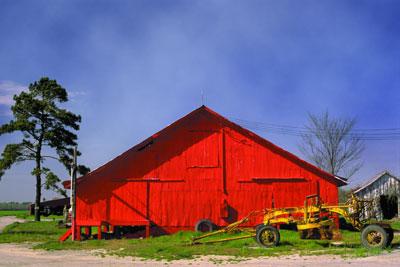
4. Select Eraser tool with soft brush and erase the bottom area to reveal the portion under the clouds prominently.
Color Change
1. Open Photoshop. Open the image to change the color.
2. Make a duplicate of the background layer and keep the duplicate layer selected. Change the top layer mode to "Overlay"
3. Image > Adjustments > Hue/Saturation (Hue: +29 Saturation: +28 Lightness: +26)
4. You can go back to step 2 before applying Hue/Saturation and apply Color Balance (Select Shadows Color Levels -100 0 +100)
5. Image > Adjustments > Brightness/Contrast (Brightness: +100 Contrast: 0)
IMAGE EFFECT
Changing to Old Photo
1. Open Photoshop. Open an image to make it old.
2. Layer > New Adjustment Layer > Hue /Saturation
3. Click OK to open Hue/Saturation window.
4. Check Colorize. Drag the sliders to following values
Hue:29 Saturation:14 Lightness:0
5. Select the image layer.
6. Filter > Noise > Add Noise
Uniform, Monochromatic, Amount:4
7. Filter > Sharpen > Sharpen
8. The image is converted into old look.
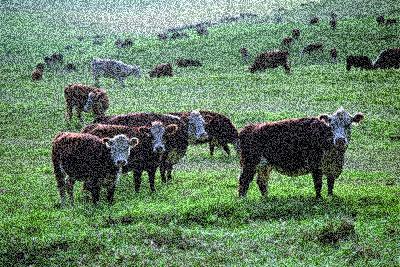
Dust Effect
1. Open Photoshop. Open desired image.
2. Go to Channel Palette and Create New Channel. Fill the channel with white color.
3. Filter > Noise > Add Noise (Guassian, Monochromatic, Amount : 25)
4. Filter > Stylize > Emboss (Angle: 135, Height: 3, Amount: 100)
5. Go to Layer Palette. Create New Layer.
6. Select > Load Selection (Alpha 1)
7. Fill the selection with white color using Alt + Del.
8. Select Eraser. Choose Spatter type of brush and erase the part of an image in such way that it should look as if the dust portion is cleaned off.
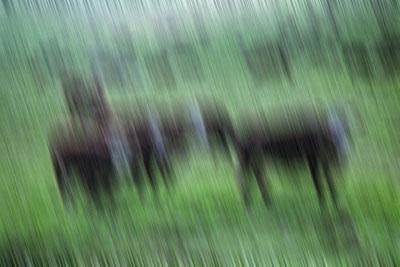
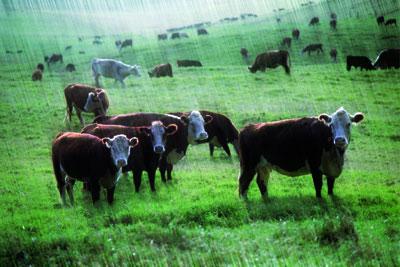
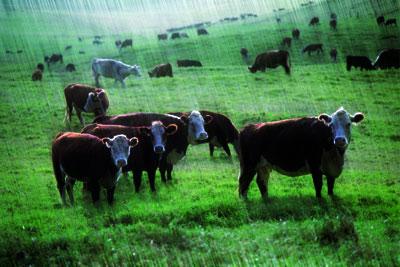
Rain
1. Open Photoshop. Open Image to apply Rain effect.
2. Make a Duplicate of the image layer and keep it selected.
Filter > Noise > Add Noise (Monochromatic, Uniform, Amount 25%)
3. Filter > Blur > Motion Blur (Angle - 73 Distance: 40 Pixels)
4. Change the top layer mode to "Overlay"
5. Add New Layer and fill it with black color. Change the layer mode to "Soft Light" with 40% Opacity
Rough Paper Effect
1. Open Photoshop. Open desired image.
2. Filter > Noise > Add Noise (Guassian, Monochromatic, Amount : 7)
3. Filter> Brush Strokes > Angled Strokes
(Direction Balance :16, Stroke Length : 3, Sharpness: 3)
Round Wooden Frame
2. Create a new file and view Grids. Create a new layer. Using snap to Grids and Rectangular Marquee Tool, draw the rectangular selection. Fill it with any color.
3. Create another rectangular selection inside the colored rectangle and press Del.
4. You will get the outer frame work.
5. Create another layer and repeat the same procedure to get one more frame inside the outer frame.
6. Create another layer and repeat the same procedure using elliptical marquee tool to get the following design. We have three separate layers for three objects.
7. Lock all the layers and fill the wood pattern in all the frames we have just created. (Lock the layers means select the layer and click "Lock Transparent Pixels" in the layer palette)
Edit > Fill > Pattern (Wood)
7. Fill the background with the same pattern.
8. Select the outer most rectangle layer.
Layer > Layer Style > Bevel & Emboss > Inner Bevel (Technique: Chisel Hard)
Adjust the rest of the settings according to requirement.
9. Use bevel effect on the inner frame layer.
Layer > Layer Style > Bevel & Emboss > Pillow Emboss
Adjust the settings according to requirement.
10. Select elliptical frame layer.
Layer > Layer Style > Bevel & Emboss > Inner Bevel (Technique: Chisel Hard)
Adjust the rest of the settings according to requirement.
11. Drag the picture in the frame and move it below elliptical frame. Adjust it according to the requirement.
12. Select the Elliptical frame layer and click outside the frame using magic wand tool.
13. Go to image frame and press Del to fit the image in the round frame. We have desaturated the image for the effect.
14. Try Brightness/Contrast on the frames to add spice.
14. Try Burn Tool on the frames to add more spice.
15. Try some design at the four corners of the frames to add more spice.
Angled Lines
1. Open Photoshop. Open an image to apply angled lines effect.
2. Create New file with 3 pixel width, 3 pixel height and transparent background.
3. Select some foreground color. Draw angled line using Pencil Tool.
4. Select All using CTRL + A
5. Create a pattern by Edit > Define Pattern. Name the pattern.
6. Close the Pattern file and go back to image file. Create new layer. Keep it selected.
7. Edit > Fill
(Choose "Pattern" from "Use" drop down menu and again in "Custom Pattern" you will find newly created pattern)
8. Select newly created pattern and fill the layer. Change the layer mode to "Multiply"
Crystal Border
1. Open Photoshop. Open the image to apply Crystal border.
2. Select Rectangular Marquee Tool and make rectangular selection on the image.
3. Go to Channels tab. Create new channel.
Select > Feather (Radius: 7)
Fill white color and deselect the selection with CTRL+ D.
4. Filters > Pixelate > Crystallize
Cell Size: 10
5. Go to Layers Tab and create new layer. Keep the new layer selected.
6. Select > Load Selection (Select Alpha1 from channel drop down and check Invert)
7. Fill white color using Alt + Del. and deselect with CTRL + D.
Uneven Edges
1. Open Photoshop. Open the image to apply uneven edge border.
2. Select Rounded Corner Tool from the toolbox (marked red in the fig.).
3. Keep "Paths" option selected as shown in the fig (marked in green).
4. Drag the rounded corner rectangle in the middle of the image as shown the the picture.
5. Go to Path Tab and click "Load path as a selection" to convert the path into selection.
6. Go to Channels tab. Create new channel. Fill white color and deselect the selection with CTRL+ D.
7. Filters > Brush Strokes > Spatter
Spray Radius: 10
Smoothness: 4
8. Go to Layers Tab and create new layer. Keep the new layer selected.
9. Select > Load Selection (Select Alpha1 from channel drop down and check Invert)
10. Fill white color using Alt + Del. and deselect with CTRL + D.
Glowing Light
1. Open Photoshop. Open Image to apply Glowing light.
2. Make a Duplicate of the image layer and turn it into gray scale using
Image > Adjustments > Desaturate
3. The layer palette will look like this. Keep the top layer selected.
4. Image > Adjustments > Invert
5. Change the blending mode of the top layer to Multiply.
6. Be on the top layer. Select Eraser Tool with soft brush and erase the portion which you want to reveal and glow.
Block Effect
1. Open an image.
2. Using Elliptical Marquee tool, make elliptical selection carefully around the main, center part of an image.
3. Press "Q" to activate Quick mask Mode
4. Filter > Stylize > Extrude
( Type: Blocks Size: 30 Depth: 30 Random )
5. Press "Q" again to Edit in standard mode. This will convert quick mask into selection. Select white color for background.
6. Select > Inverse (Press Del to delete selected portion )
7. Press Ctrl + D to deselect the selection.

Dotted Border
1. Open Photoshop. Open the image to apply Dotted border.
2. Select Rectangular Marquee Tool and make rectangular selection on the image.
3. Go to Channels tab. Create new channel.
Select > Feather (Radius: 7)
Fill white color and deselect the selection with CTRL+ D.
4. Filters > Pixelate > Color Halftone
Fill the values according to the above figure.
5. Go to Layers Tab and create new layer. Keep the new layer selected.
6. Select > Load Selection (Select Alpha1 from channel drop down and check Invert)
7. Fill white color using Alt + Del. and deselect with CTRL + D.
Plain Emboss Frame
1. Open Photoshop. Open the image to create Plain Emboss frame.
2. Create New file with 640 X 480 Pixels and drag the image on it using Move tool.
3. Create a new layer in the middle of background and image layer. Keep it Selected. You can name it as a BASE frame layer if you want.
4. Draw rectangular selection around the image for frame using Rectangular Marquee Tool, on the BASE frame layer.
5. Fill it with the desired color that will match to the main image. You can pick up from the image itself or use Swatches. Deselect using CTRL + D
6. Layer > Layer Style > Bevel and Emboss (Style : Inner Bevel)
7. Create another layer above BASE frame layer and draw another rectangle on it using Rectangular Marquee tool. It should be smaller than the rectangle on the BASE frame layer. Fill it with the same color used for the BASE frame layer. Deselect using CTRL + D.
8. Layer > Layer Style > Bevel and Emboss (Style : Pillow Emboss)
9. Image > Trim to trim the image.
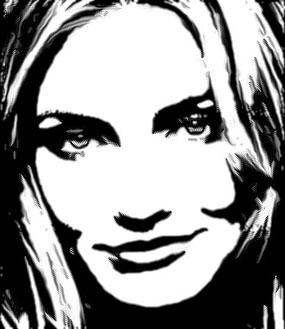
Black & White Sketch
1. Open Photoshop. Open desired image. We need to convert it first into black & white.
2. Image >Adjustments > Threshold
3. Filter > Stylize > Diffuse
Select "Anisotropic"
4. Filter > Sharpen > Sharpen More
Line Art
1. Open Photoshop. Open Image to create line art.
2. Make a Duplicate of the image layer and turn it into gray scale using
Image > Adjustments > Desaturate
3. Filter > Stylize > Find Edges
4. Image > Adjustments > Brightness/Contrast (use following readings)
5. You will get following effect after adding Brightness/Contrast.
6. You can use brush tool with white color to remove any portion from the image.
7. Filter > Sharpen > Sharpen More
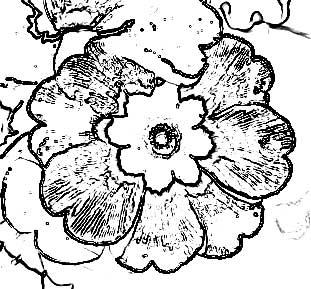
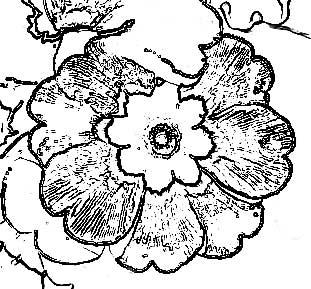
Patchwork Grids
1. Open Photoshop. Open an image to apply patchwork grid effect.
2. Create a new layer in the layer palette and fill it with white color. Keep the layer selected.
3. Filter > Texture > Patchwork
Square Size - 1 Relief - 0
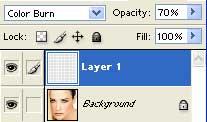
4. Change the layer blending mode to Color Burn and Opacity to 70%
ketch Effect
1. Open an image.
2. Image > Adjustments > Desaturate
3. Make a duplicate of the desaturated layer. Keep the duplicate later selected.
4. Image > Adjustments > Invert
5. Change the layer mode to "Color Dodge"
6. Filter > Blur > Gaussian Blur (Radius 4.9)
aking Red Hot
1. Open an image.
2. Drag the image on the file with white background. Change the Blending Mode of the image layer to Hard Light. Keep The Layer Selected.
3. Image > Adjustments > Brightness/Contrast
Brightness: 0 Contrast: +100
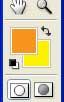
Gold Texture
1. Create new file. Keep following colors for foreground and background.
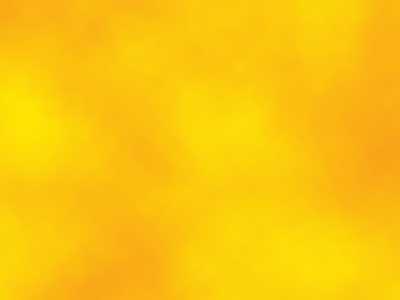
2. Filter > Render > Clouds
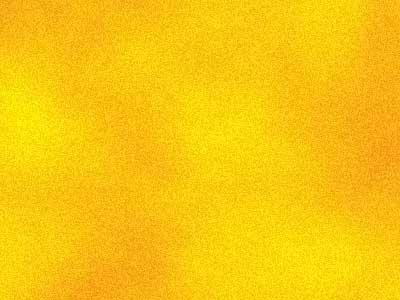
3. Filter > Noise > Add Noise
(Amount: 7, Uniform, Monochromatic)
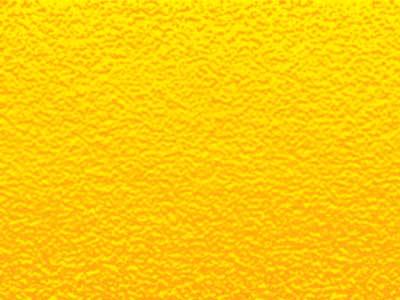
4. Image > Sketch > Bas Relief
(Detail: 13, Smoothness: 2, Light: Bottom)
5. Image > Adjustments > Brightness/Contrast
(Brightness: +7, Contrast: +10)
Sand Textures
1. Create new file.
2. we have selected the following colors for the sand texture.
3. Filter > Render > Clouds
4. Filter > Noise > Add Noise (Amount: 7 Uniform, Monochromatic)
5. Create the duplicate of background layer and select the top layer.
6. Change the blending mode of the top layer to Vivid Light.
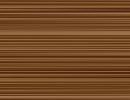
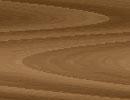
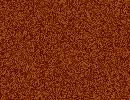
Wood Textures - Part 1
1. Create new file with 72 PPI and white background.
2. Select any shade of Brown as a foreground color.
3. Press Alt + Delete to fill foreground color.
4. Filter > Add Noise
(Uniform, Monochromatic, 27)
5. Filter > Motion Blur (angle 0, distance 450 or experiment with more)
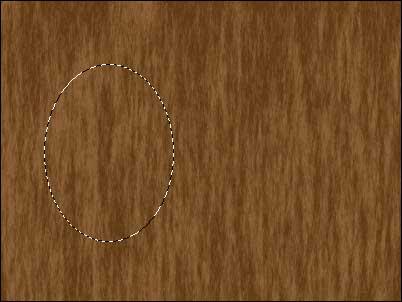
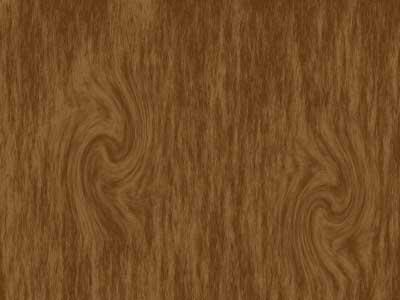
Wood Textures - Part 2
1. Make it more effective and real
3. Select Ellipse tool and draw small horizontal ellipse somewhere in the middle.
4. Filter > Distort > Twirl (Angle 150)
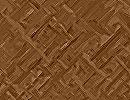
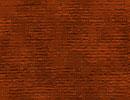
Wood Textures - Part 3
1. Create new file with 72 PPI and white background.
2. Select any shade of Brown as a foreground color.
3. Press Alt + Delete to fill foreground color.
4. Filter > Add Noise (Uniform, Monochromatic, 16)
5. Filter > Pixelate > Crystallize (amount 7)
6. Filter > Brush Strokes > Angled Strokes
Direction Balance : 34
Stroke Length : 50
Sharpness : 10
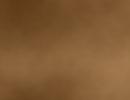
Wood Textures - Part 4
1. Take light and dark brown color for foreground & background respectively
Render > Clouds
2. Filter > Add Noise
(Uniform, Monochromatic, 7)
3. Filter > Pixelate > Mosaic
(cell size 4)
4. Distort > Shear
Follow the pattern given below
5. You get the wood texture
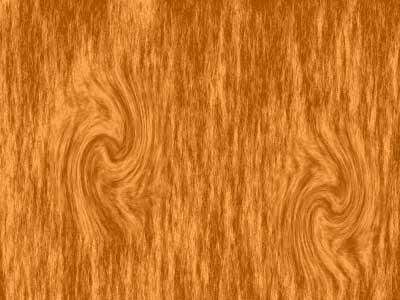
Wood Textures - Part 5
1. Create new file. Keep light brown and dark brown colors for foreground and background respectively.
2. we have selected the colors shown in the image below.
3. Filter > Render > Fibers (Varience:27.0 Strength:4.0)
4. Draw ellipse or the circle using Elliptical Marquee Tool.
5. Filter > Distort > Twirl (angle 176)
6. Make one more knot on another location using the same technique.
7. Image > Adjustments > Auto Color
Rust Texture
1. Create new file with 72 PPI and white background.
2. Select proper color from Swatches
(we have selected 7 row 2nd col) as a foreground color.
3. Press Alt + Delete to fill foreground color.
4. Filter > Add Noise
(Uniform, Monochromatic, 16)
5. Filter > Artistic > Underpainting
brush size 6
texture coverage 16
Texture canvas
scaling 100%
Relief 4
light direction Top
Rust Textures - 2
1. Create new file.
2. we have selected the following colors for the rust texture.
3. Filter > Render > Clouds
4. Filter > Noise > Add Noise (Amount: 7 Uniform, Monochromatic)
5. Filter > Brush Strokes > Ink Outlines
(Stroke Length: 18, Dark Intensity: 10, Light Intensity: 5)
6. Filter > Sharpen > Unsharp Mask
(Amount: 194, Radius: 1.3, Threshold: 0)
Dust Texture
1. Create new file with default black and white color.
2. Filter > Render > Different Clouds
2. Filter > Noise > Add Noise
(Amount: 7, Uniform, Monochromatic)
3. Filter > Brush Strokes > Ink Outlines
(Stroke Length: 18, Dark Intensity: 10, Light Intensity: 5)
4. Filter > Stylize > Emboss
5. Image > Adjustments > Hue/Saturation
(Select Colorize, Hue: 40, Saturation: 20, Lightness: 0)
Mud Texture
1. Create new file. Keep default black and white color for foreground and background by pressing D
2. Filter > Render > Different Clouds
3. Filter > Stylize > Find Edges
4. Image > Adjustments > Auto Levels
5. Filter > Sharpen > Sharpen More
6. Image > Adjustments > Hue/Saturation
Check Colorize
Hue: 20, Saturation: 50 Lightness: -8
STONE TEXTURE
1. This effect is sometimes called Rocky Texture. Create new file with 72 PPI and white background.
2. Select light gray for foreground and dark gray (near to black) for background.
Filter > Render > Clouds

3. Image > Adjust > Auto Levels
4. Filter > Stylize > Emboss
5. Image > Adjust > Auto Levels
Jeans Textures
1. Create new file. Fill it with the suitable blue color.
2. Filter > Sketch > Halftone Patterns
(Size: 1, Contrast: 10, Pattern Type: Dot)
3. Filter > Noise > Add Noise
(Guassian, Amount: 27 Uncheck Monochromatic)
5. Image > Adjustments > Hue/Saturation
Check Colorize.
(Hue: 211, Saturation: 61, Lightness: +22)
Stone Surface Texture
1. Create new file with default black and white color.
2. Filter > Render > Different Clouds
2. Filter > Artistic > Paint Daubs
(Brush Size: 8, Sharpness: 7, Brush Type: Simple)

3. Filter > Stylize > Emboss
(Angle: 135, Height: 3, Amount: 100%)
4. Image > Adjustments > Auto Levels
5. Image > Adjustments > Hue/Saturation
(Select Colorize, Hue: 40, Saturation: 24, Lightness: 0)
Marble Texture
1. Create new file. Keep default black and white color for foreground and background by pressing D
2. Filter > Render > Different Clouds
3. Filter > Render > Different Clouds
Repeat the procedure for Different Clouds filter till you get marble like basic texture.
4. Image > Adjustments > Equalize
5. Image > Adjustments > Shadow/Highlight
(Shadows Amount: 100 %, Highlights Amount: 0%)
6. Image > Adjustments > Hue/Saturation
(Hue: 139, Saturation: 22, Lightness: +24)
Rough Metal Surface Texture
1. Create new file. Using Gradient Tool, with default black and white color fill the canvas like following image.
2. Filter > Noise > Add Noise
(Amount: 7, Uniform, Monochromatic)
3. Filter > Artistic > Rough Pastels
(Stroke Length: 6, Stroke Details: 4, Texture: Sandstone, Scaling: 100%,
Relief: 50, Light: Bottom)
4. Image > Sharp > Unsharp Mask
(Detail: 13, Smoothness: 2, Light: Bottom)